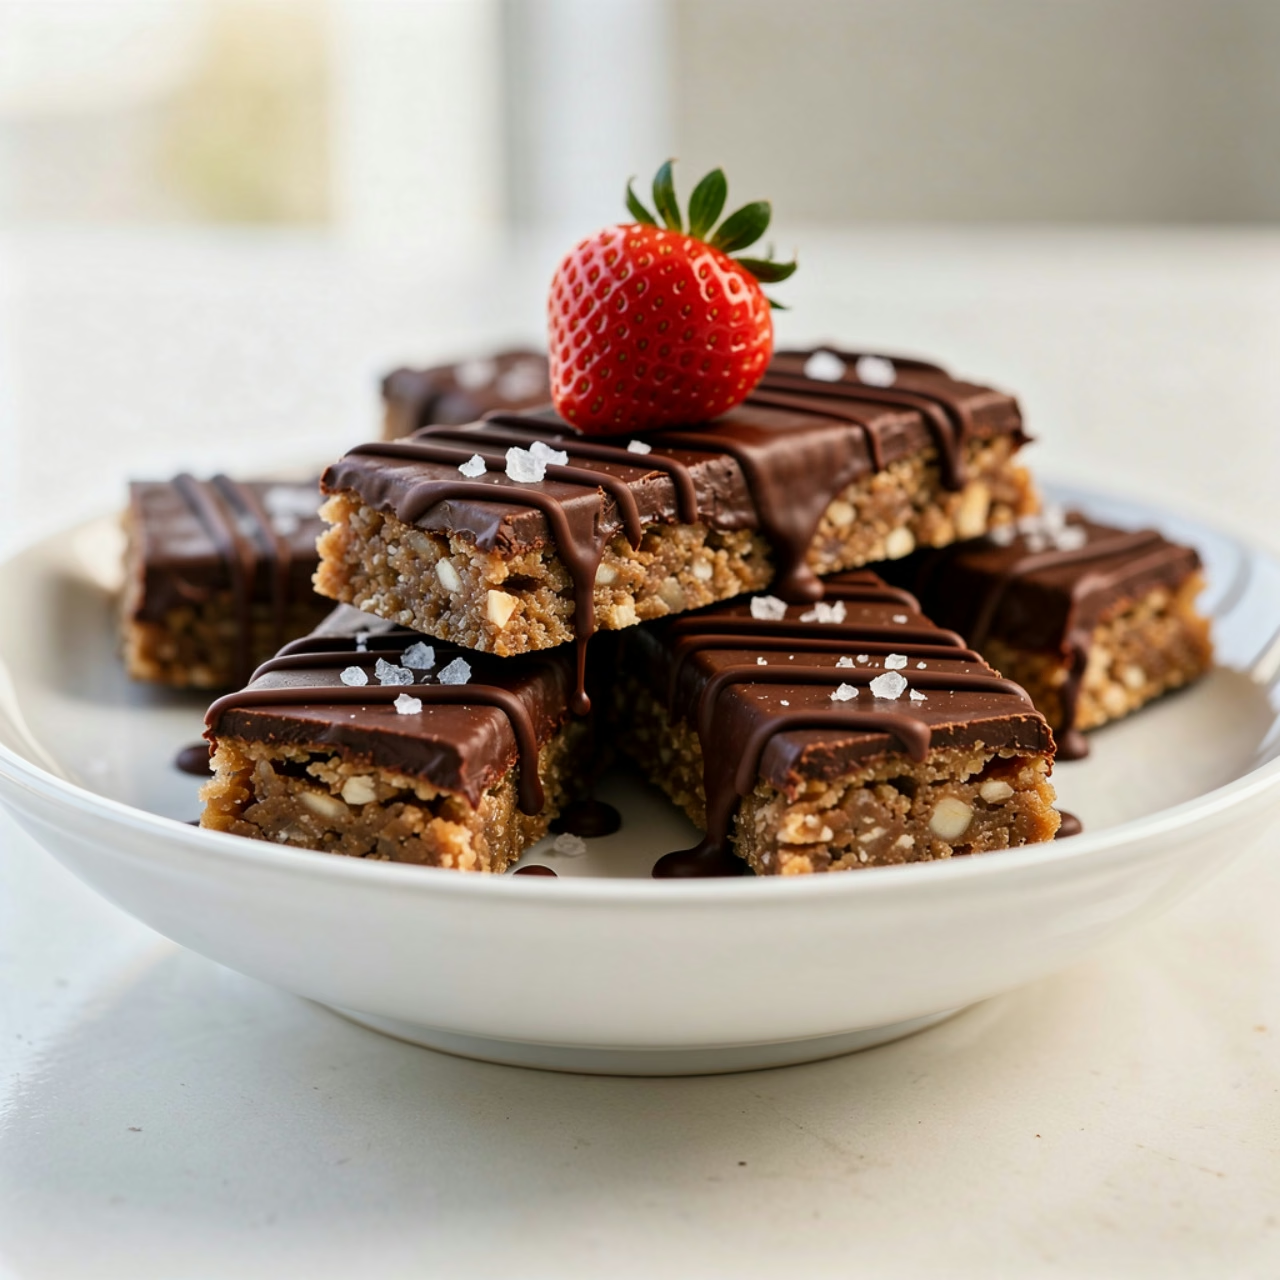
Easy Chocolate Protein Bars – Healthy & Homemade
If you have ever stood in the grocery store staring at a wall of overpriced protein bars loaded with ingredients you cannot pronounce, this recipe is going to change everything for you. These Easy Chocolate Protein Bars are rich, fudgy, genuinely satisfying, and packed with the kind of nutrition your body actually wants. Whether you are fueling a morning workout, powering through an afternoon slump, or just craving something chocolatey that does not wreck your macros, these bars deliver every single time.
What makes this recipe so special is how little effort it takes to produce something that tastes like a real treat. We are talking about a no-bake method, pantry-friendly ingredients, and a batch that keeps all week. These are the healthy protein bars you will actually look forward to eating, not just tolerate.
What Makes This Recipe Special
- No baking required: The entire process happens in one bowl and a pan. No oven, no special equipment, no stress.
- Seriously satisfying: Each bar is dense, chocolatey, and rich enough to feel indulgent while still fitting cleanly into a high-protein eating plan.
- Meal prep hero: This is one of those easy high protein meals (well, snacks) that you make once and enjoy all week long.
- Completely customizable: Swap the protein powder, change the mix-ins, adjust the sweetness. This base recipe is endlessly flexible.
What You’ll Need
- Chocolate protein powder: Use your favorite brand. Whey, casein, or plant-based all work here. This is the backbone of every good protein bar recipe healthy enough to feel clean.
- Rolled oats: Old-fashioned oats add chew, fiber, and staying power. Do not use instant oats as they make the texture too soft.
- Natural peanut butter: Creamy is easiest to mix, but chunky adds a nice texture contrast. Almond butter or sunflower butter work beautifully as substitutes.
- Honey or maple syrup: Just enough to bind everything and add a gentle sweetness without going overboard.
- Cocoa powder: Unsweetened cocoa deepens that chocolate flavor without adding sugar.
- Dark chocolate chips: Folded in for pockets of melty, bittersweet chocolate throughout every bite.
- Milk of choice: Just a splash to bring the mixture together. Any milk works, dairy or non-dairy.
- Vanilla extract: A small amount that rounds out all the other flavors.
- Pinch of sea salt: Balances the sweetness and makes the chocolate flavors pop.
Using quality ingredients and having a reliable mixing setup makes a real difference in the final texture of these bars. Here’s the complete recipe:

Easy Chocolate Protein Bars
Equipment
- Large mixing bowl
- 8x8 inch baking dish
- Parchment paper
- Spatula
Ingredients
- 1 cup chocolate protein powder whey or plant-based both work
- 1.5 cups rolled oats old-fashioned, not instant
- 0.5 cup natural peanut butter creamy, warmed slightly if stiff
- 3 tbsp honey or maple syrup
- 2 tbsp unsweetened cocoa powder
- 0.5 cup dark chocolate chips
- 3 tbsp milk of choice dairy or non-dairy, plus more as needed
- 1 tsp vanilla extract
- 0.25 tsp sea salt
Instructions
- Line an 8x8 inch baking dish with parchment paper, leaving overhang on two sides so you can lift the bars out easily after chilling.
- In a large mixing bowl, whisk together the chocolate protein powder, rolled oats, cocoa powder, and sea salt until evenly combined.
- Add the peanut butter, honey or maple syrup, vanilla extract, and 3 tablespoons of milk. Stir firmly until a thick, moldable dough forms. If the mixture feels too dry or crumbly, add additional milk one tablespoon at a time until it just holds together when squeezed.
- Fold in the dark chocolate chips until evenly distributed throughout the mixture.
- Transfer the mixture into the prepared baking dish and press it down firmly and evenly using a spatula or your hands. The firmer you press, the better the bars will hold their shape after cutting.
- Refrigerate for at least 2 hours, or place in the freezer for 30 to 45 minutes, until completely firm.
- Lift the slab out of the pan using the parchment overhang and place on a cutting board. Slice into 10 to 12 bars. Serve immediately or store in an airtight container in the refrigerator for up to 7 days.
Notes
Ways to Customize
- Go nut-free: Swap peanut butter for sunflower seed butter and you have a school-safe, allergy-friendly version of these healthy protein snacks.
- Add crunch: Stir in puffed rice cereal, crushed pretzels, or toasted coconut flakes for an interesting textural contrast.
- Boost the flavor: A teaspoon of espresso powder intensifies the chocolate flavor dramatically without making the bars taste like coffee.
- Change the protein: Vanilla protein powder with white chocolate chips and dried cranberries creates a completely different but equally delicious bar.
Step-by-Step Instructions
- Prepare your pan: Line an 8×8 inch baking dish with parchment paper, leaving some overhang on the sides so you can lift the bars out easily once they set.
- Mix the dry ingredients: In a large mixing bowl, whisk together the protein powder, rolled oats, cocoa powder, and sea salt until evenly combined.
- Add the wet ingredients: Add the peanut butter, honey or maple syrup, vanilla extract, and two tablespoons of milk. Stir everything together firmly. The mixture should be thick and moldable. If it feels too dry and crumbly, add milk one tablespoon at a time until it just comes together.
- Fold in chocolate chips: Once the base mixture is fully combined, fold in the dark chocolate chips. Work quickly so the warmth of your hands does not melt them.
- Press into the pan: Transfer the mixture into the prepared pan and press it down firmly and evenly using the back of a spatula or your hands. The more firmly you press, the better the bars will hold their shape.
- Chill to set: Place the pan in the refrigerator for at least 2 hours, or in the freezer for 30 to 45 minutes if you are in a hurry. The bars need to be fully firm before cutting.
- Slice and serve: Lift the slab out using the parchment overhang, place it on a cutting board, and slice into 8 to 12 bars depending on your preferred size.
Chef’s note: Cold hands make pressing the mixture easier and cleaner. Run your hands under cold water and dry them before pressing the mixture into the pan.
Pro Tips for Success
- Measure the protein powder by weight if possible: Protein powders vary wildly in density. A kitchen scale gives you the most consistent results when following any protein bars recipe.
- Do not skip chilling: The most common mistake people make is cutting into the bars too soon. They need adequate time in the cold to firm up properly. Rushing this step leads to crumbly, messy bars.
- Warm your peanut butter slightly: If your natural peanut butter is stiff, microwave it for 15 to 20 seconds before mixing. It incorporates far more smoothly into the dry ingredients.
- Taste the mixture before pressing: Before it goes into the pan, taste the mixture and adjust. More cocoa for deeper chocolate flavor, more honey for sweetness, a pinch more salt to balance. This is your chance to perfect it.
Serving Ideas
- Pre-workout fuel: Eat one bar about 30 minutes before exercise for a clean, sustained energy boost.
- Breakfast on the go: Pair a bar with a piece of fruit and a black coffee for a complete, balanced breakfast that travels well.
- Afternoon snack plate: Slice bars into smaller squares and serve alongside fresh berries and Greek yogurt for a protein-rich snack spread.
- Dessert swap: Warm a bar for 10 seconds in the microwave and serve with a small scoop of vanilla ice cream for an indulgent but relatively nutritious dessert.
Make Ahead and Storage
- Refrigerator: Store cut bars in an airtight container, layered with parchment between them, for up to 7 days. They actually improve slightly in texture after the first day.
- Freezer: These chocolate protein bars freeze exceptionally well. Wrap each bar individually in plastic wrap, place them in a freezer-safe bag, and freeze for up to 3 months.
- Thawing: Move bars from the freezer to the refrigerator the night before you want them, or thaw at room temperature for about 20 minutes.
- Avoid room temperature storage: Because of the nut butter content, these bars soften and can become greasy if left at room temperature for more than a couple of hours.
Frequently Asked Questions
Can I make these bars without protein powder?
Yes. Replace the protein powder with an equal amount of almond flour or additional rolled oats. The bars will be slightly less protein-dense but still delicious and hold together well.
Which protein powder works best for this protein bar recipe healthy?
Chocolate-flavored whey protein gives the smoothest texture, but plant-based blends work well too. Avoid protein powders with a strong artificial sweetener aftertaste as that flavor amplifies in a no-bake recipe.
Why are my bars too crumbly?
The mixture likely needed more liquid. Add milk one tablespoon at a time and mix thoroughly before pressing. The mixture should hold together when you squeeze a handful without falling apart.
Are these considered easy high protein meals for meal prep?
Absolutely. One batch made on Sunday gives you a week of ready-to-grab healthy protein bars with no reheating, no prep, and no excuses.
Final Thoughts
There is something genuinely satisfying about making your own healthy protein bars recipes from scratch, knowing exactly what is in them and tasting the difference good ingredients make. These Easy Chocolate Protein Bars hit every note: rich chocolate flavor, a satisfying chewy texture, solid nutrition, and the kind of convenience that makes healthy eating feel effortless. Make a batch this weekend and see just how quickly they disappear.